官方文档https://cn.vuejs.org/
注意:Vue-cli4.0之后不再适用
主流框架特点
- React:虚拟DOM
- angular:将MVC理念引入前端->MVVM
MVVM:Model+View+ViewModel
第一个Vue程序
引入Vue
1
2
3
4
| 开发环境版本
<script src="https://cdn.jsdelivr.net/npm/vue/dist/vue.js"></script>
生产环境版本
<script src="https://cdn.jsdelivr.net/npm/vue"></script>
|
1
2
3
4
5
6
7
8
9
10
11
12
13
14
| <div id="app">
{{message}}
</div>
<script src="../lib/vue.js"></script>
<script>
var vm = new Vue({
el: "#app",
data: {
message: "hello,vue!"
}
});
</script>
|
插入文本三种方式:
{{message}}插值表达式v-text:"message"v-html:"<p>message</p>"
vue的实现方式

Vue基础语法
v-bind绑定元素特性
基本格式
1
2
3
4
5
6
7
8
9
10
11
|
<div id="app" v-bind:title="message">测试</div>
<script src="../lib/vue.js"></script>
<script>
var vm = new Vue({
el: "#app",
data: {
message: "hello,vue!"
}
});
</script>
|
条件&循环
布尔值判断v-if和v-else
1
2
3
4
5
6
7
8
9
10
11
12
13
| <div id="app">
<h1 v-if="istrue">Yes</h1>
<h1 v-else>No</h1>
</div>
<script src="../lib/vue.js"></script>
<script>
var vm = new Vue({
el: "#app",
data: {
istrue: true
}
});
</script>
|
表达式,多重判断
1
2
3
4
5
6
7
8
9
10
11
12
13
14
15
| <div id="app">
<h1 v-if="type==='A'">A</h1>
<h1 v-else-if="type==='B'">B</h1>
<h1 v-else-if="type==='C'">C</h1>
<h1 v-else>error</h1>
</div>
<script src="../lib/vue.js"></script>
<script>
var vm = new Vue({
el: "#app",
data: {
type: 'A'
}
});
</script>
|
循环
1
2
3
4
5
6
7
8
9
10
11
12
13
14
15
16
17
18
| <div id="app">
<li v-for="item in items">
{{item.message}}
</li>
</div>
<script src="../lib/vue.js"></script>
<script>
var vm = new Vue({
el: "#app",
data: {
items: [
{message:'message01'},
{message:'message02'},
{message:'message03'}
]
}
});
</script>
|
事件
点击发生事件
1
2
3
4
5
6
7
8
9
10
11
12
13
14
15
16
17
18
19
| <div id="app">
<button v-on:click="sayHi">click me</button>
</div>
<script src="../lib/vue.js"></script>
<script>
var vm = new Vue({
el: "#app",
data: {
message: "Hi!"
},
methods: {
sayHi: function () {
alert(this.message)
}
}
});
</script>
|
双向绑定
通过v-model将view数据绑定view-model
1
2
3
4
5
6
7
8
9
10
11
12
13
14
15
16
17
18
19
20
| <div id="app">
<select id="" v-model="choice">
<option value="">--请选择--</option>
<option>A</option>
<option>B</option>
<option>C</option>
</select>
<p>已选择:{{choice}}</p>
</div>
<script src="../lib/vue.js"></script>
<script>
var vm = new Vue({
el: "#app",
data: {
choice: ""
},
});
</script>
|
Vue组件
实现代码复用
1
2
3
4
5
6
7
8
9
10
11
12
13
14
15
16
17
18
19
| <div id="app">
<my-component v-for="item in items" v-bind:info="item"></my-component>
</div>
<script src="../lib/vue.js"></script>
<script>
Vue.component("my-component",{
props: ['info'],
template: '<li>{{info}}</li>'
})
var vm = new Vue({
el: "#app",
data: {
items: ['Java', 'Linux', 'Spring']
}
});
</script>
|
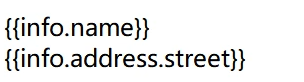
Vue闪烁问题
由于Vue先加载对象再进行渲染,在加载页面时最初会将原变量名显示出来,如下图所示
优化方式
添加样式
1
2
3
4
5
| <style>
[cloak]{
display: none;
}
</style>
|
view层
1
2
3
4
| <div v-cloak>
<div>{{info.name}}</div>
<div>{{info.address.street}}</div>
</div>
|
Axios
需要传输的数据data.json
1
2
3
4
5
6
7
8
9
10
11
12
13
14
15
16
17
18
19
20
21
22
23
24
25
| {
name:狂神说java,
url: http://baidu.com,
page: 1,
isNonProfit:true,
address: {
street: 含光门,
city:陕西西安,
country: 中国
},
links: [
{
name: B站,
url: https://www.bilibili.com/
},
{
name: 4399,
url: https://www.4399.com/
},
{
name: 百度,
url: https://www.baidu.com/
}
]
}
|
html
1
2
3
4
5
6
7
8
9
10
11
12
13
14
15
16
17
18
19
20
| <div v-cloak id="vue">
<div>{{info.name}}</div>
<div>{{info.address.street}}</div>
</div>
<script src="../lib/vue.js"></script>
<script src="../lib/axios.js"></script>
<script>
var vm = new Vue({
el: "#vue",
data(){
return{
info: {}
}
},
mounted(){
axios.get('./data.json').then(response=>(this.info=response.data))
}
});
</script>
|
计算属性computed
将不经常变化的计算结果进行缓存,节省系统开销
1
2
3
4
5
6
7
8
9
10
11
12
13
14
15
16
17
18
19
20
21
22
23
24
25
| <div id="vue">
<p>currentTime1:{{currentTime1()}}</p>
<p>currentTime1:{{currentTime2}}</p>
</div>
<script src="../lib/vue.js"></script>
<script>
var vm = new Vue({
el: "#vue",
data: {
message: "default message"
},
methods: {
currentTime1: function () {
return Date.now();
}
},
computed: {
currentTime2: function () {
return Date.now();
}
}
});
</script>
|
插槽slot
插槽是组建的扩展,允许在使用组件时同时显示原本的html内容,同时允许递归调用
如:
定义组件my-component
1
2
3
4
5
6
7
| Vue.component("my-component",{
template: '<p>'+
'这是组件'+
'<slot></slot>'+
'</p>'
})
|
使用组件情形
1
2
3
| <my-component>
其中的一些信息
</my-component>
|
如果不使用插槽时父组件将会被直接替代为my-component中的内容:
如果使用slot时,父组件中的内容将会得到保留:
可以看到,插槽为父组件预留了保留信息的窗口
自定义事件
- 子组件使用props接收父组件的数据
- 子组件使用$emit()触发父组件的自定义事件
我们首先需要理清关系,这非常重要
- vm
- 元素:
items, item_in_vm, index_in_vm,其中后两项是items的子元素
- 方法:
removeInVM(index)实际进行删除操作
- 组件
todo-items
- 元素:
item_in_component, index_in_component
- 方法:
removeInComponent(index)自定义事件
- 回传给视图层的函数映射:
remove_message
1
2
3
4
5
6
7
8
9
10
11
12
13
14
15
16
17
18
19
20
21
22
23
24
25
26
27
28
29
30
31
| <div id="vue">
<todo-items v-for="(item_in_vm,index_in_vm) in items" :item_in_component="item_in_vm"
:index_in_component="index_in_vm"
@remove_message="removeInVM"></todo-items>
</div>
<script src="../lib/vue.js"></script>
<script>
Vue.component("todo-items", {
props: ['index_in_component', 'item_in_component'],
template: '<li>{{index_in_component}} {{item_in_component}} <button @click="removeInComponent">删除</button></li>',
methods: {
removeInComponent: function (index) {
this.$emit('remove_message', index);
}
}
});
var vm = new Vue({
el: "#vue",
data: {
items: ["object01", "object02", "object03"]
},
methods: {
removeInVM: function (index) {
console.log("删除了" + this.items[index]);
this.items.splice(index, 1);
}
}
});
</script>
|
执行流程
- 通过
v-for="(item_in_vm,index_in_vm) in items"获取vm中的数据,并通过:item_in_component="item_in_vm"和:index_in_component="index_in_vm"传递给组件
- 当点击删除按钮时,只能调用本作用域之内的方法,即
removeInComponent,并通过this.$emit('remove_message', index)自定义事件,即remove_message作为自定义事件在父组件中直接调用
- 父组件中由
@remove_message="removeInVM"绑定vm中的方法,完成vm中元素的删除
组件之间和vm之间的方法都不能互相调用,而视图层可以与这些对象进行双向绑定,从而达到传输信息的目的
Vue-cli
开始
需要Nodejs的支持,Nodejs自带npm包管理器,笔者使用npm安装失败,故使用cnpm安装Vue-cli包cnpm install vue-cli -g
vue init webpack vue_project初始化vue项目(vueProject为自定义项目名称,不能包含大写)npm install vue-router --save-dev安装vue-routernpm i element-ui -S安装ElementUI依赖npm install安装package.json文件所指定的依赖包cnpm install sass-loader node-sass --save-dev安装SASS加载器7.3.1版本npm run dev运行开发环境,之后即可在对应端口(默认8080)上看到前端工程项目
npm相关命令介绍
npm install moduleName -g全局安装,位置为npm config prefix位置npm install moduleName --save 将模块安装到项目目录下并在package.json文件中写入依赖,缩写为-Snpm install moduleName --save-dev 将模块安装到项目目录下并在package.json文件中的devDependencies下写入依赖,缩写为-D
Webpack入门
安装
npm install webpack -gnpm install webpack-cli -g
文件结构
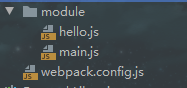
hello.js
1
2
3
| exports.sayHi = function () {
document.write("<h1>Hello Webpack!</h1>")
}
|
main.js
1
2
| var hello = require("./hello")
hello.sayHi()
|
webpack.config.js
1
2
3
4
5
6
7
| module.exports = {
entry: "./module/main.js",
output: {
filename: "./js/bundle.js"
},
mode: 'development'
}
|
webpack单次部署webpack --watch热部署,每次更新js后自动重新打包
部署之后得到集成的js文件,可以在静态代码中直接引入
1
| <script src="dist/js/bundle.js"></script>
|
Vue-Router
安装(保存在生产配置文件中)
1
| npm install vue-router --save-dev
|
显式导入
1
2
| import VueRouter from './vue-router'
Vue.use(VueRouter);
|
src下新建router路径,并在其中新建Router配置文件index.js
1
2
3
4
5
6
7
8
9
10
11
12
13
14
15
16
17
18
19
20
21
22
23
24
25
26
27
28
29
30
31
32
33
| import Vue from 'vue';
import VueRouter from 'vue-router';
import Component from '../components/Content'
import HelloWorld from "../components/HelloWorld";
import NotFound from "../components/error/404";
Vue.use(VueRouter);
export default new VueRouter({
mode: 'hash',
routes: [
{
path: '/content',
name: 'content',
component: Component
},
{
path: '/main',
name: 'main',
component: HelloWorld
},
{
path: '*',
component: NotFound
}
]
})
|
main.js中导入router配置
1
2
3
4
5
6
7
8
9
10
11
12
13
| import Vue from 'vue'
import App from './App'
import router from './router'
new Vue({
el: '#app',
router,
components: { App },
template: '<App/>'
})
|
template中引入
1
2
3
4
5
6
7
8
9
10
11
12
13
14
15
16
17
18
| <template>
<div id="app">
<img src="./assets/logo.png"><br>
<router-link to="/main">首页</router-link>
<router-link to="/content">内容页</router-link>
<router-view></router-view>
</div>
</template>
<script>
export default {
name: 'App',
components: {
}
}
</script>
|
ElementUI
需要sass-loader7.3.1支持
main.js
1
2
3
4
5
6
7
8
9
10
11
12
13
14
15
16
| import Vue from 'vue'
import App from './App'
import router from './router'
import ElementUI from 'element-ui'
import 'element-ui/lib/theme-chalk/index.css'
Vue.use(router);
Vue.use(ElementUI);
new Vue({
el: '#app',
router,
render: h => h(App)
})
|
嵌套路由
index.js
1
2
3
4
5
6
7
8
9
10
11
12
13
14
15
16
17
18
19
20
21
22
23
24
25
26
27
| import Vue from 'vue';
import VueRouter from 'vue-router';
import Component from '../components/Content'
import HelloWorld from '../components/HelloWorld';
import UserList from '../views/user/List';
import UserProfile from '../views/user/Profile';
Vue.use(VueRouter);
export default new VueRouter({
routes: [
{
path: '/content',
component: Component
},
{
path: '/main',
component: HelloWorld,
children: [
{path:'/user/list', component: UserList},
{path:'/user/profile', component: UserProfile}
]
}
]
})
|
子路由只能在其对应的父组件下才能够正常跳转
vue-axios
导入
1
2
3
4
| import axios from 'axios';
import VueAxios from "vue-axios";
Vue.use(VueAxios,axios);
|